Stabilizer Links Replacement
Replacing worn and broken stabilizer bar links on my 1999 Toyota Avalon
Problem
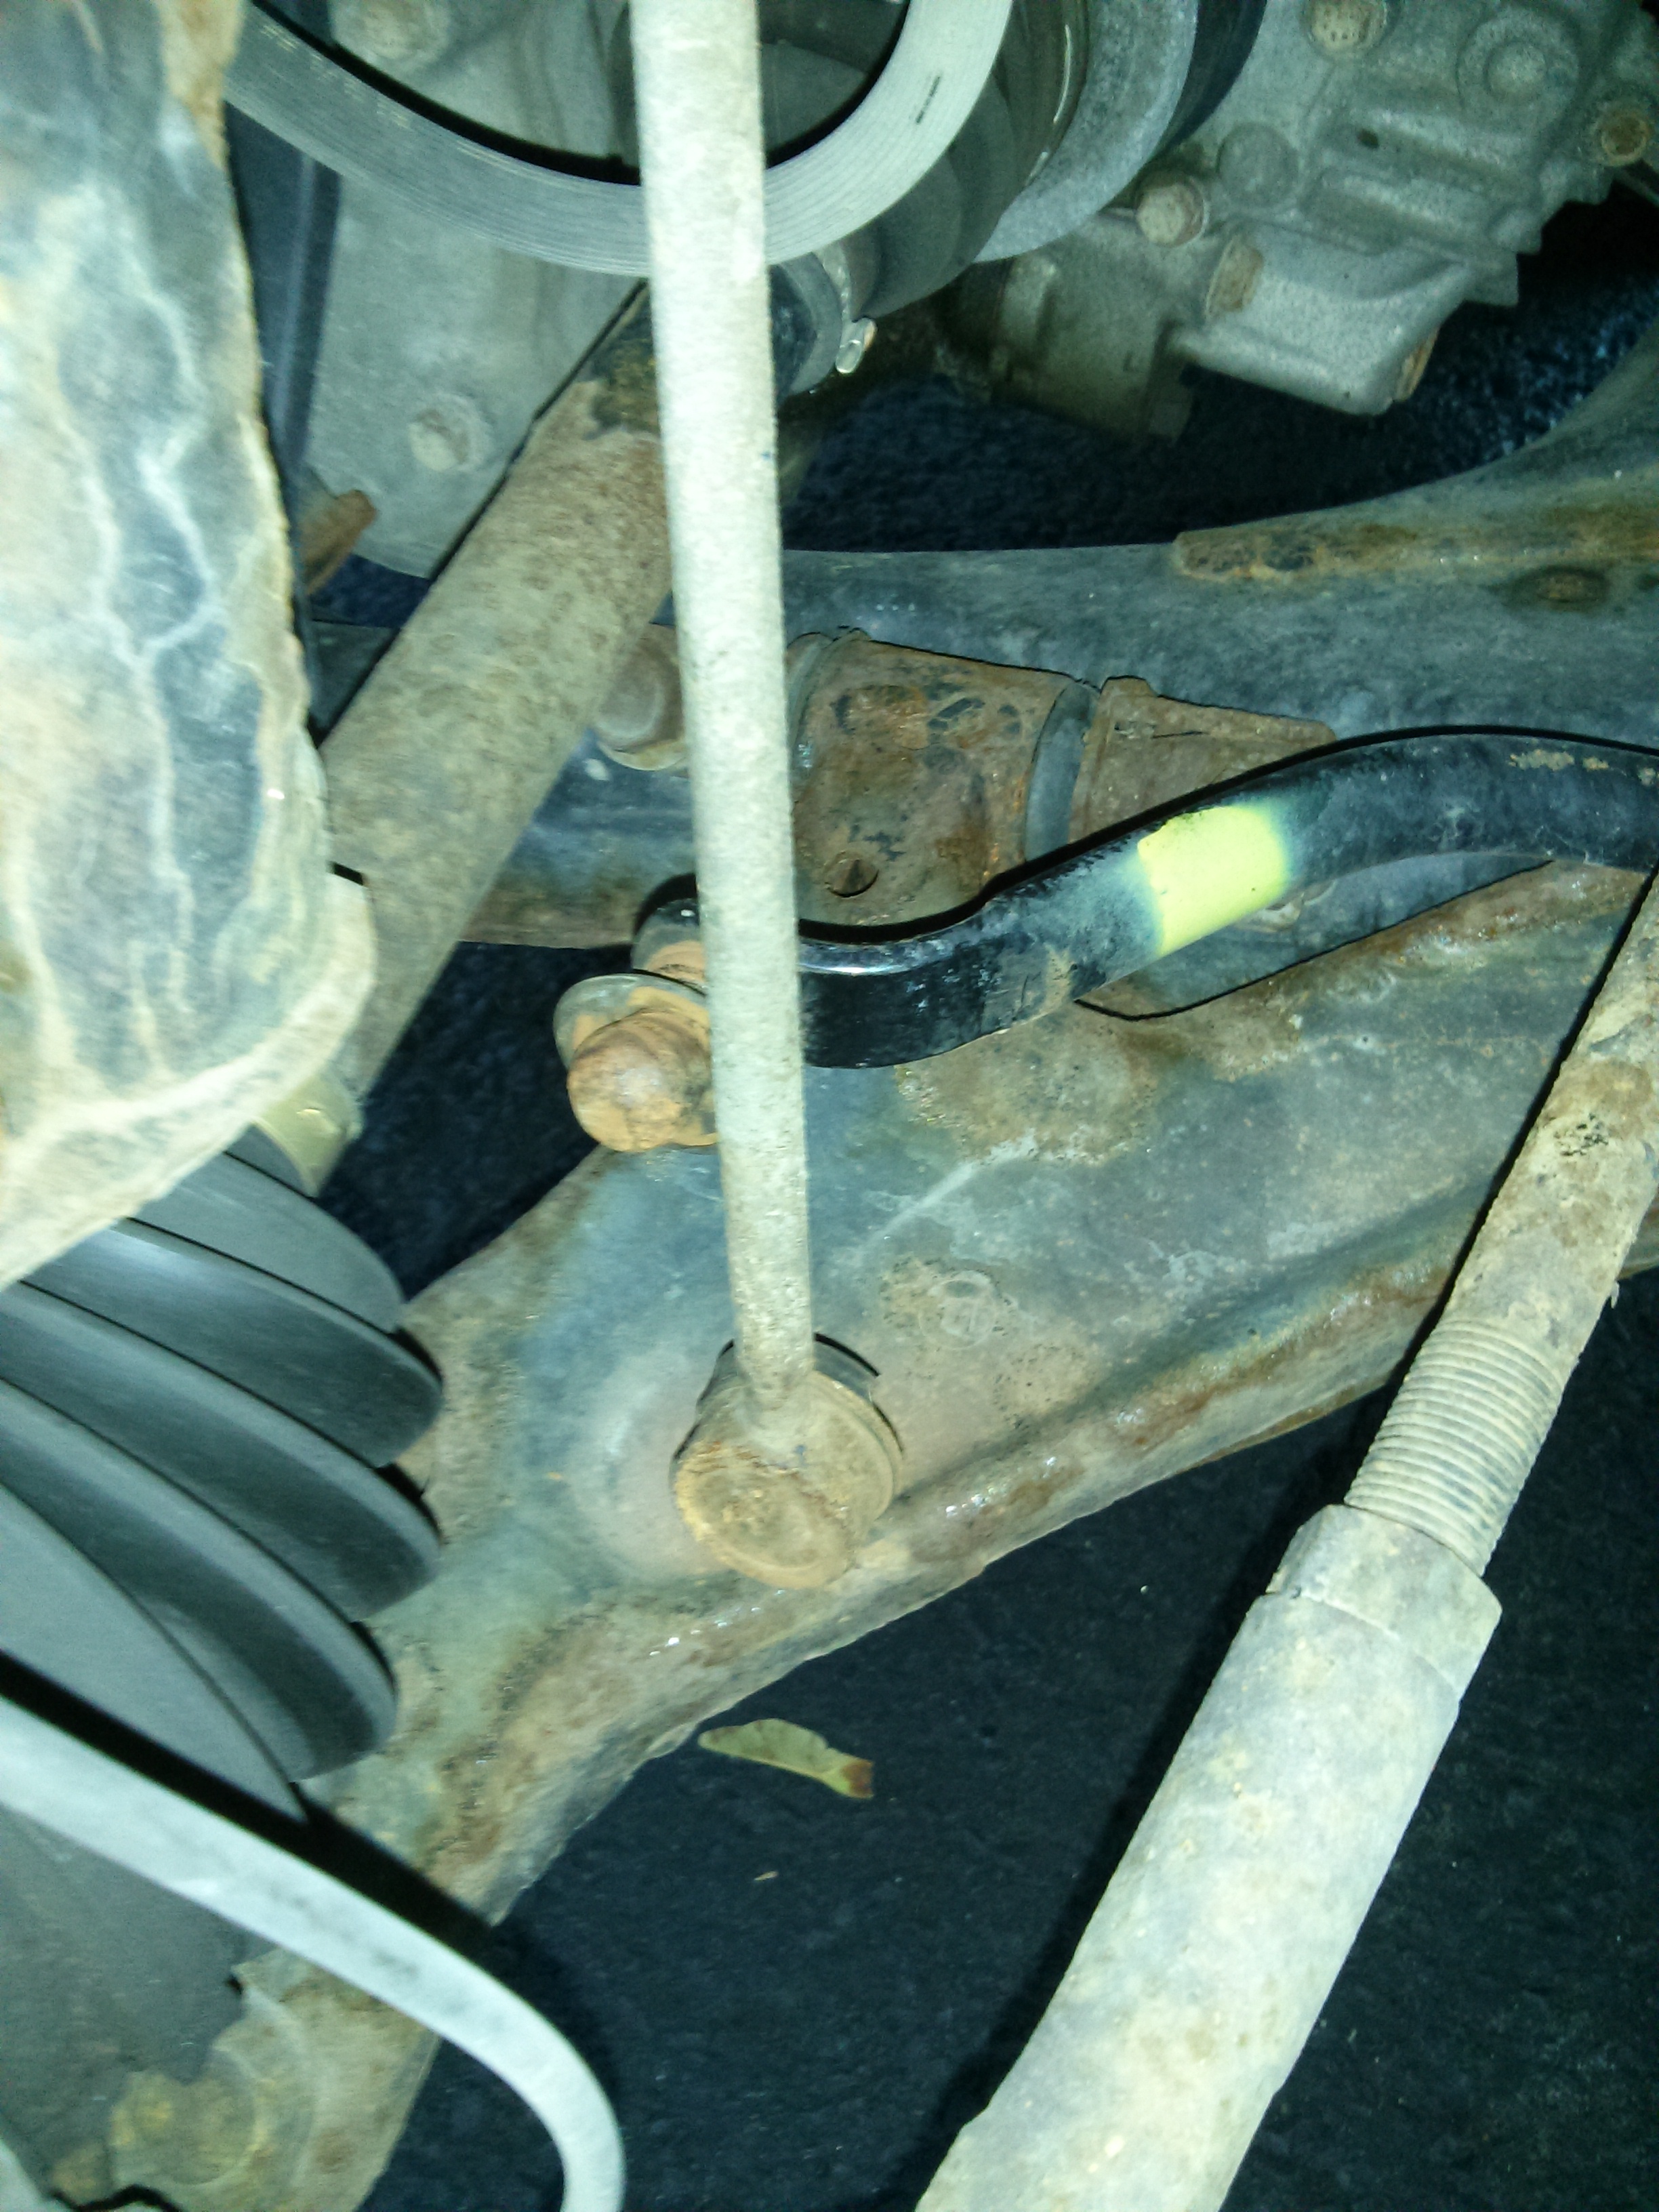
The left stabilizer bar link broke at the bottom joint. The lack of a complete stabilizer set (bar and 2 links) caused the car to lean quite a bit during turns. The broken joint was rusted to the stabilizer bar and I had been unable to remove it to install a new link.
The following image shows the broken part. The stabilizer bar has yellow paint on it, and the vertical bar is the link. While removing the link was easy, removing the joint was not.
Failed Attempts
- Wrench and breaker bar. Space and position limits the leverage I could put, and the entire stabilizer bar would flex when I put any meaningful force.
- Propane torch and penetrating spray. Using either of these to try to break the rust between the bolt and nut failed.
- Dremel and nut splitter to try to cut the nut off the bolt failed. Even when split, the nut was rusted to the bolt.
Successful Attempt
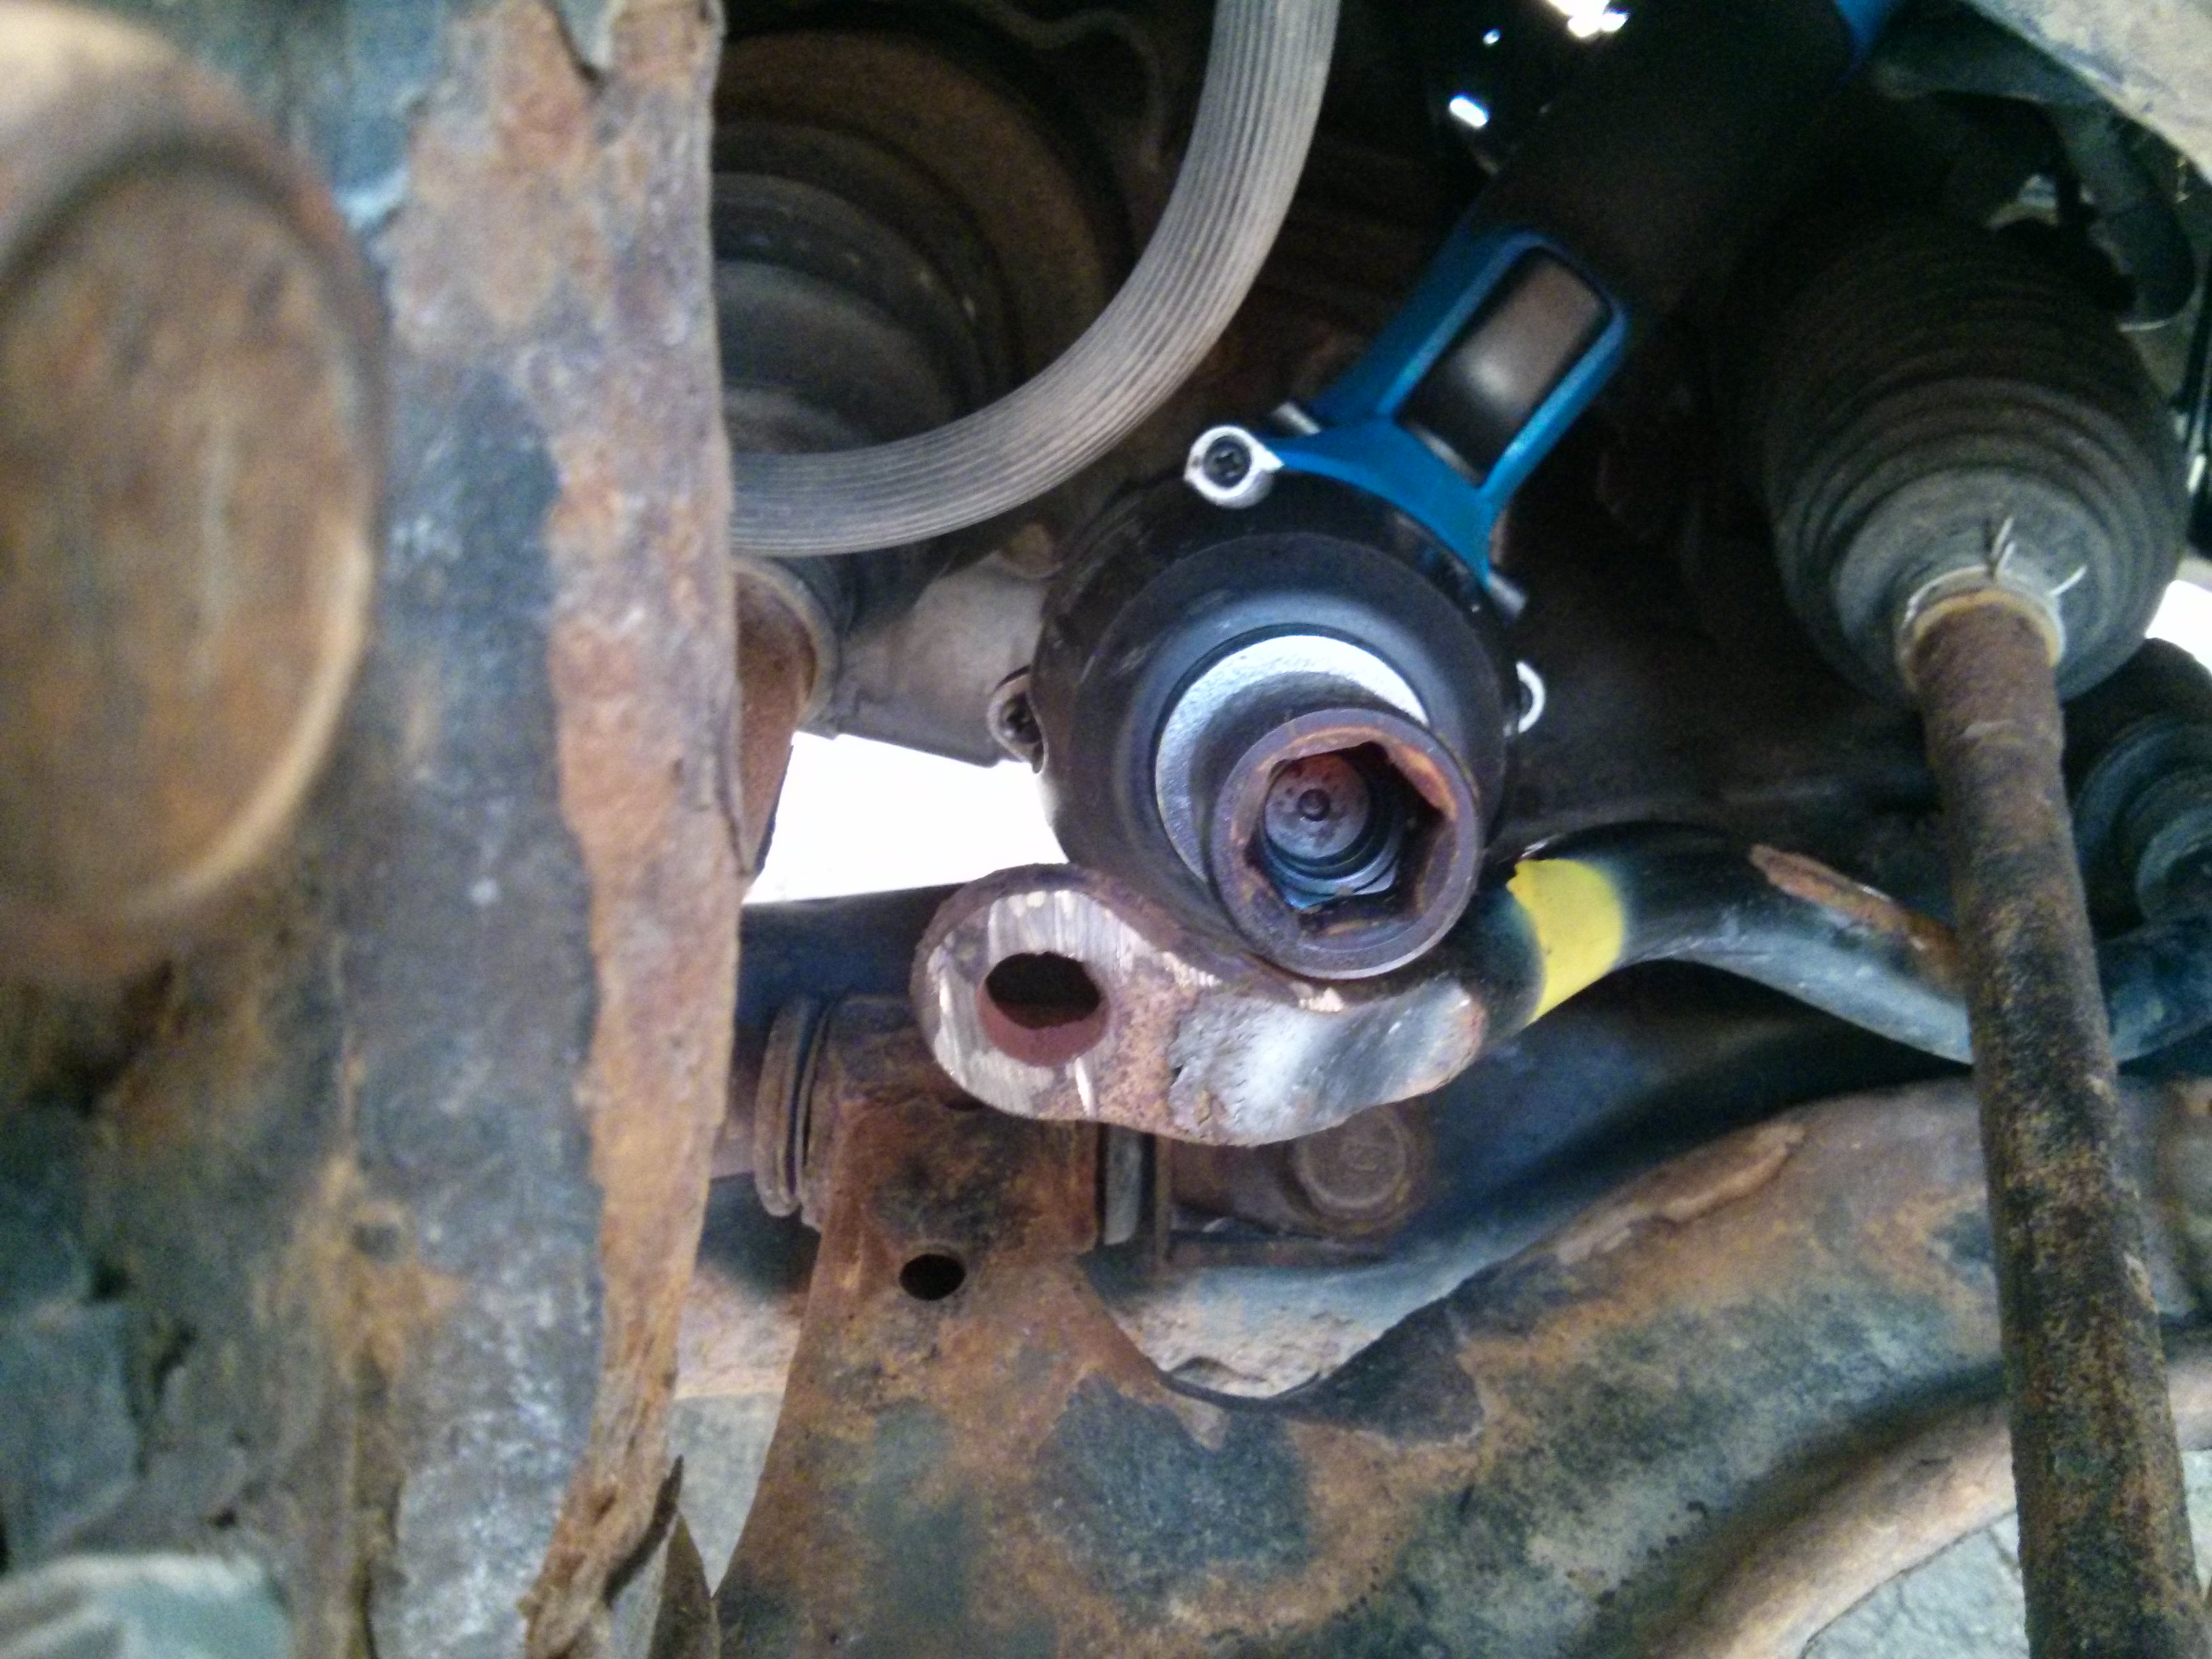
I finally decided to go a more destructive but definitive route of cutting and grinding off the bolt. I bought a 4.5" angle grinder with cutoff and grinding wheels. I cut the bolt off with the cutoff wheel, then grinded the bolt material down to the stabilizer bar, even grinding some of the stabilizer bar itself. I wasn't able to grind the other side with the nut due to space constraints and thought I was stuck again, but I managed to squeeze my electric impact wrench behind and remove the nut. The following photo shows the aftermath.
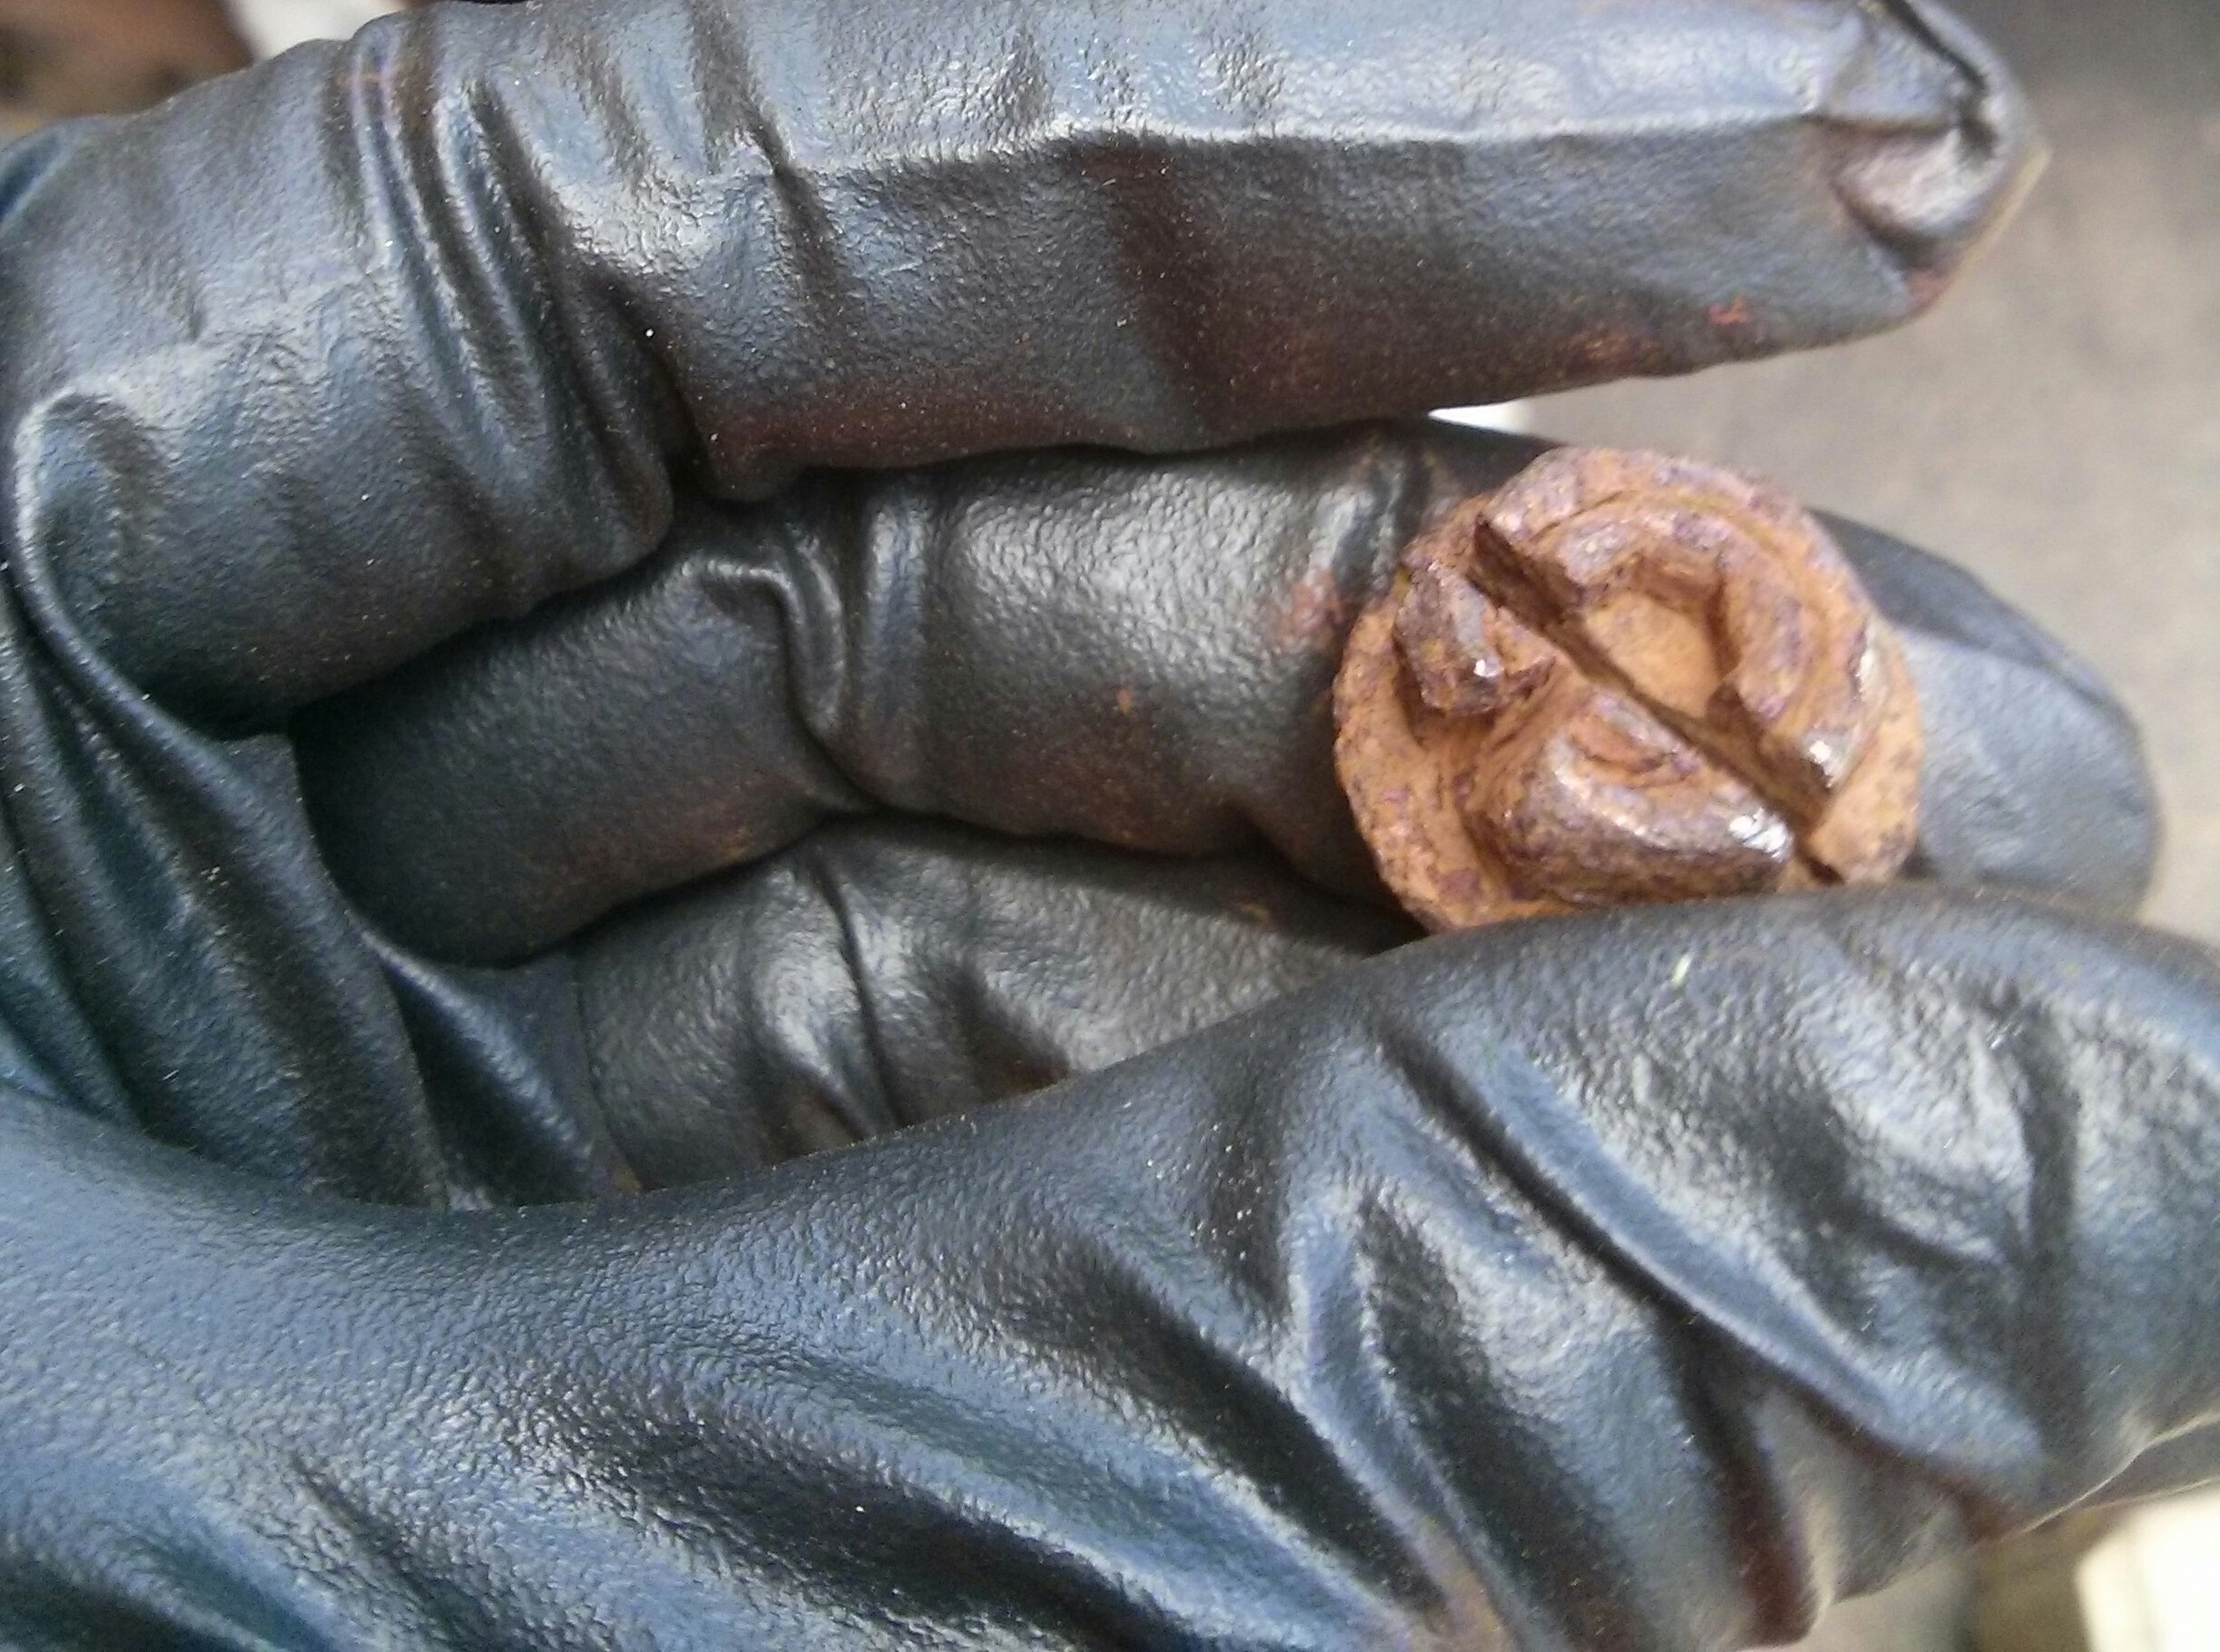
Here is nut that had caused all this. Even with most of the nut cut split, it was still rusted to the bolt.
Installing New Links
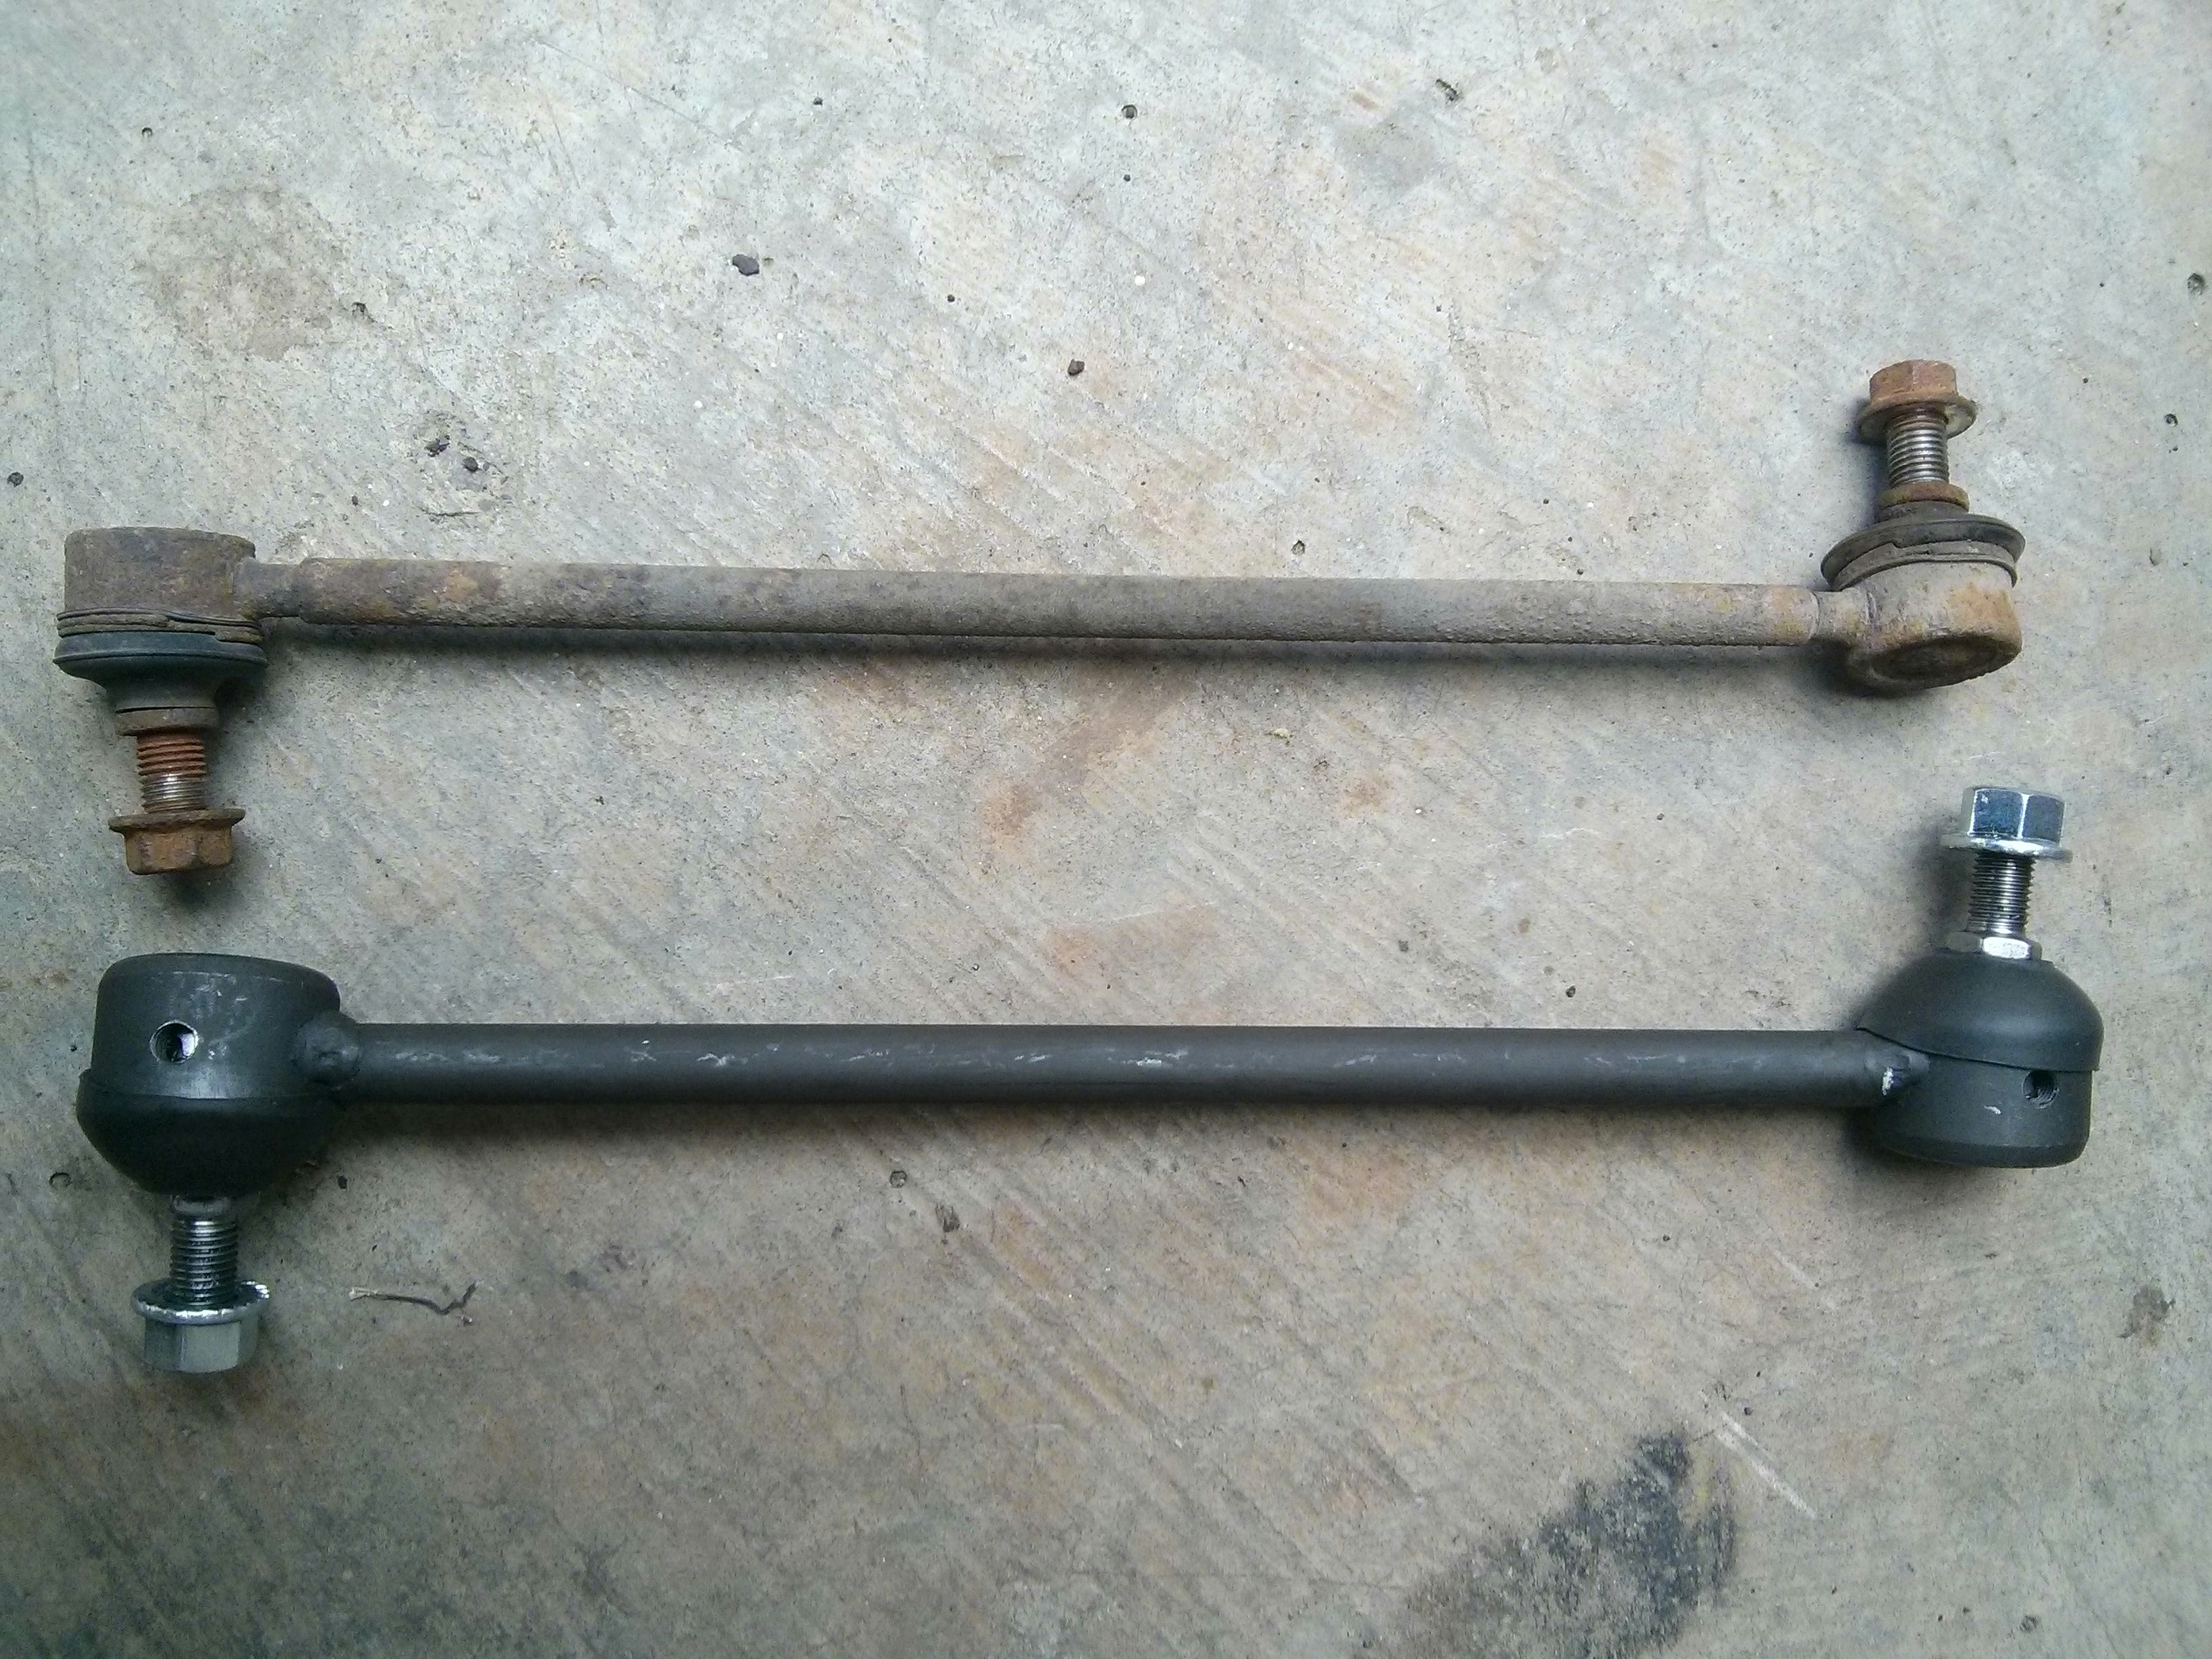
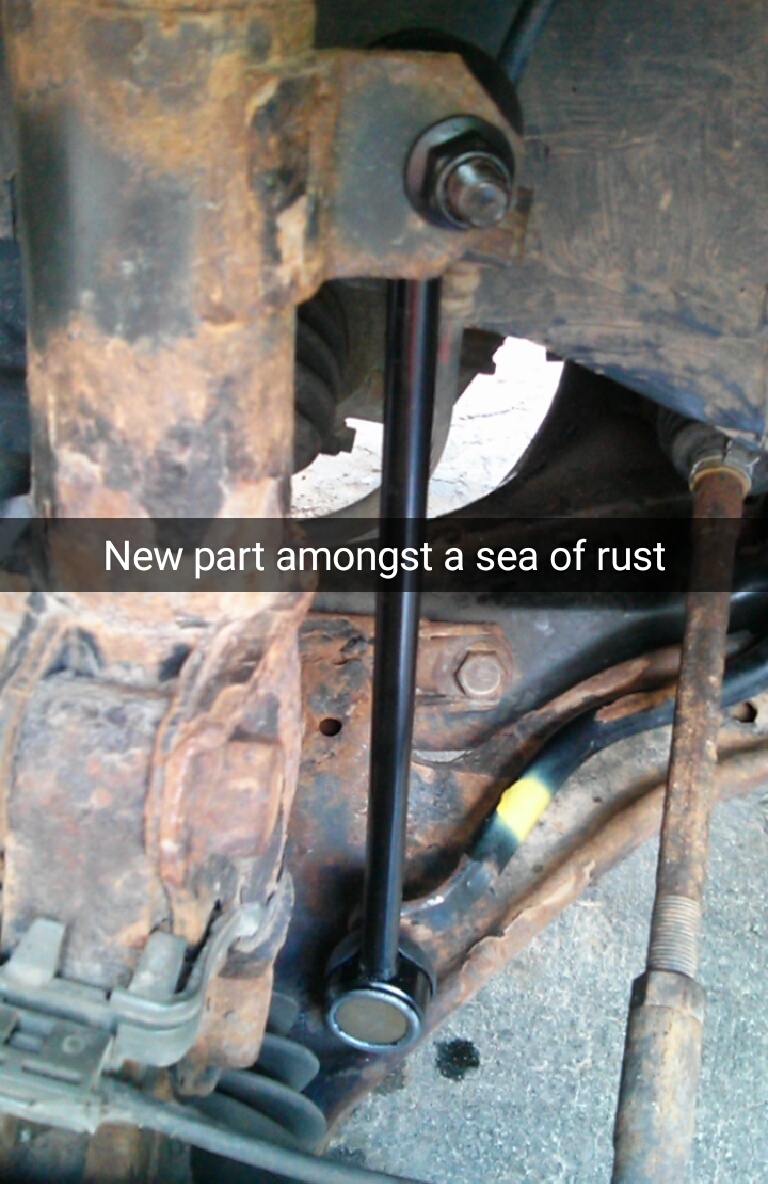
I bought a pair of aftermarket stabilizer links to replace the old ones. I replaced both sides as the other side was worn, and I prefer to do any brake/suspension repairs on both sides to keep things even. The new links are different from the OEM in a few ways. They have a thicker bar and seem heavier overall which I assume is an advantage for strength. They're unsealed joints so the rubber protection is just covering the joint rather than sealing it in. There's an opening to insert a grease gun to manually grease the joint as being open means that the grease will need replenishing if it gets dirty and thin. I skipped greasing it as there was some grease in it already, but it's something I'll have to keep in mind during later maintenance. The aftermarket links also have a 14mm nut by the joint which can be used to hold it in place while removing the 15mm bolt holding it to the stabilizer bar. In contrast, the OEM links use a hex key in the centre of the bolt which can get stripped, and means you can't use a socket to loosen it.
I applied some anti-seize to the threads so I wouldn't have the same issue again, and bolted the links to the car.
Result
During the test drive, the difference between having an improper stabilizer set and a good one was very apparent. I was able to make tight turns comfortably where before I'd have to lean in my seat and worry about the outer wheel losing traction and spinning. With this fix the car feels years younger with better cornering performance.
Relevant to this issue was when my rear stabilizer bar bushing bolts had rusted and broken off into the body. Without having the rear stabilizer bar held to the car, and not having the front stabilizer bar complete, the car felt like a boat during turns. Luckily the rear stabilizer bar bushings are held to the car in a replaceable part, and I was able to salvage a pair from a junkyard.