Front Brake Maintenance
Maintenance and Caliper Replacement on my 1999 Toyota Avalon
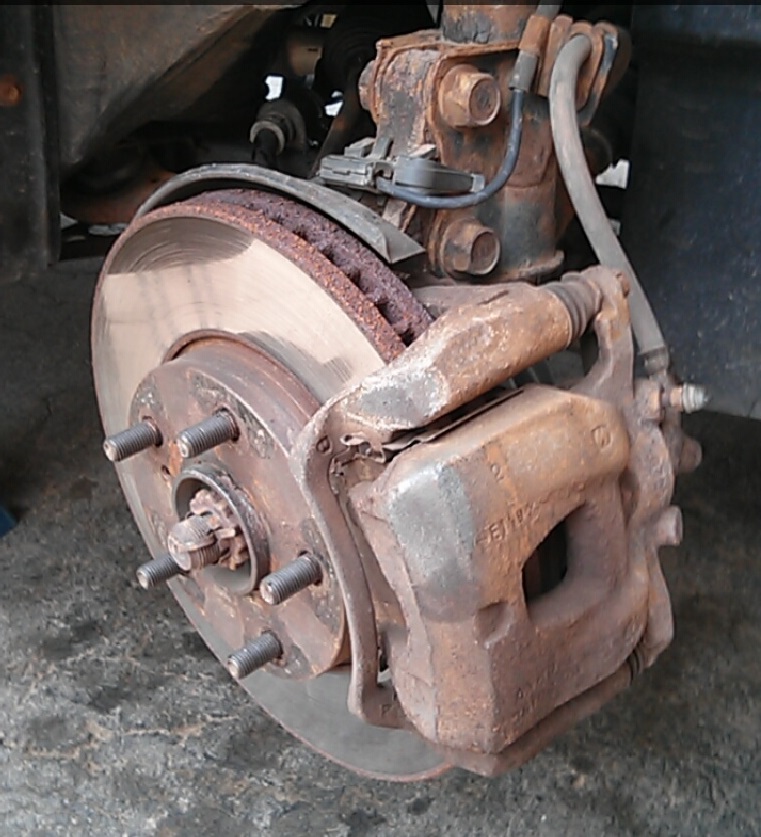
I'd replaced my front rotor and pads three years earlier, and hadn't done any maintenance since. I would sometimes hear a bit of squeaking from my front right brake but visual inspection didn't reveal anything obvious. I decided to take the brakes and calipers off to clean and inspect them.
Disassembly and Inspection
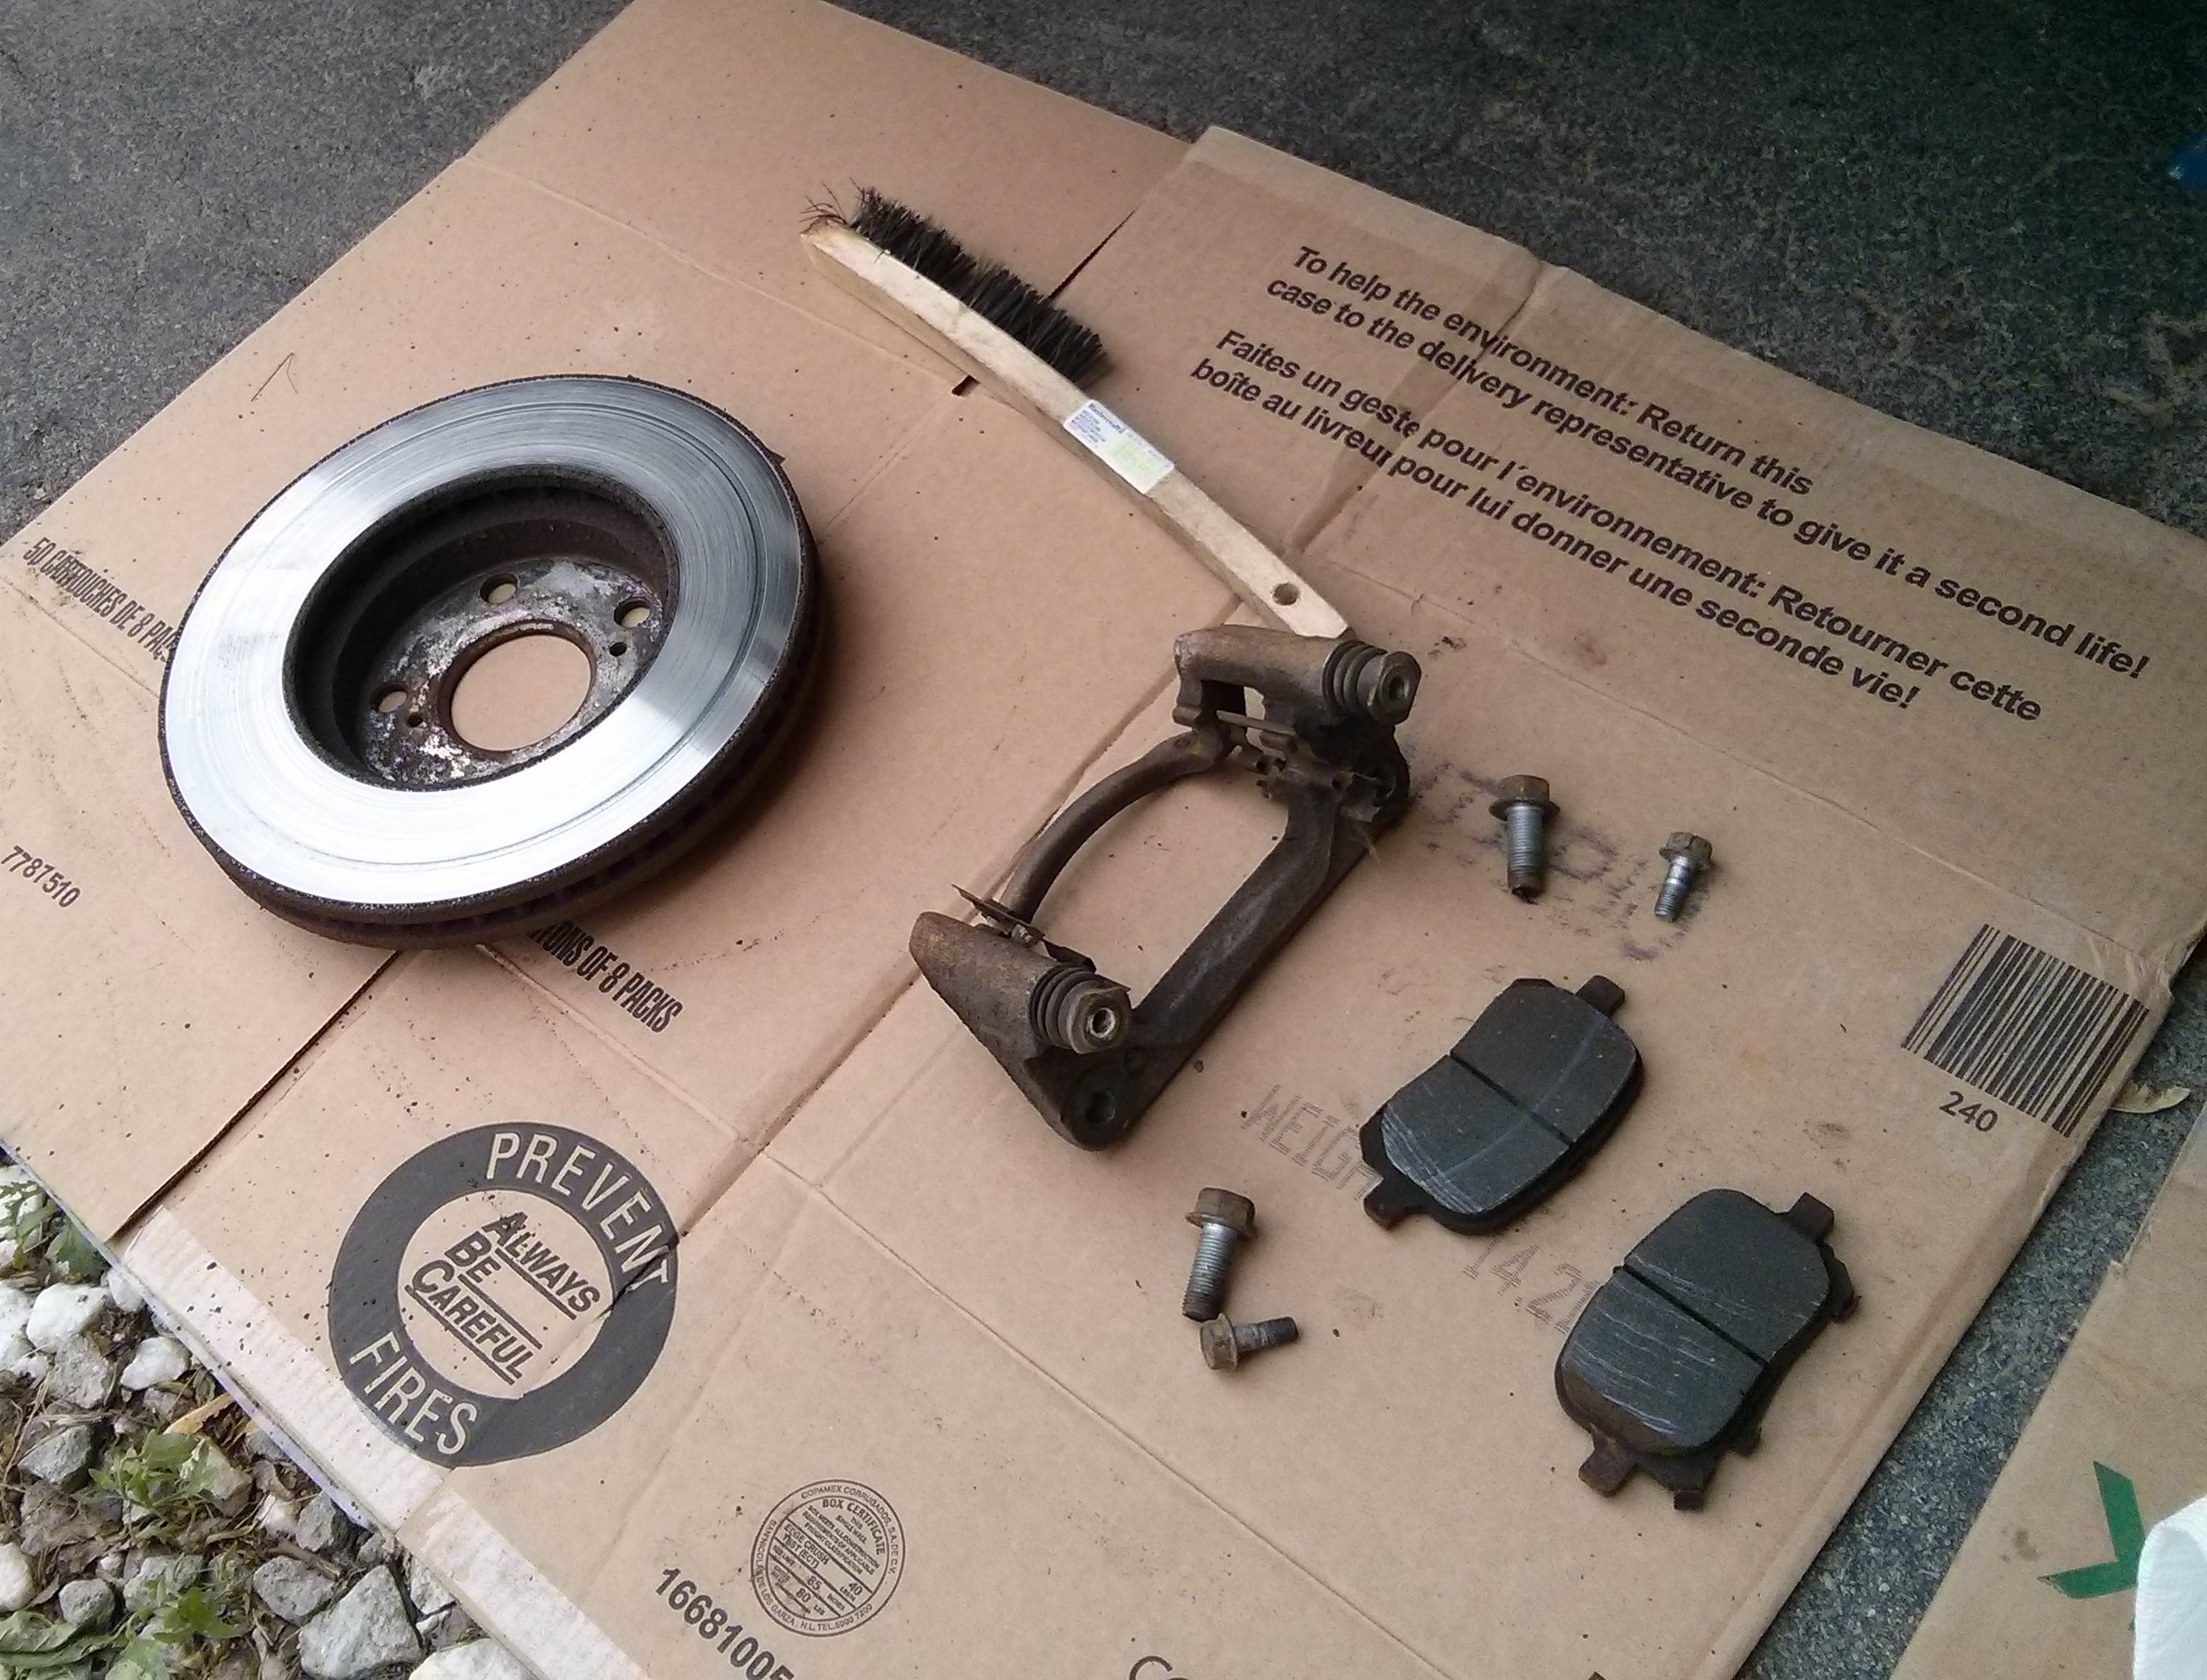
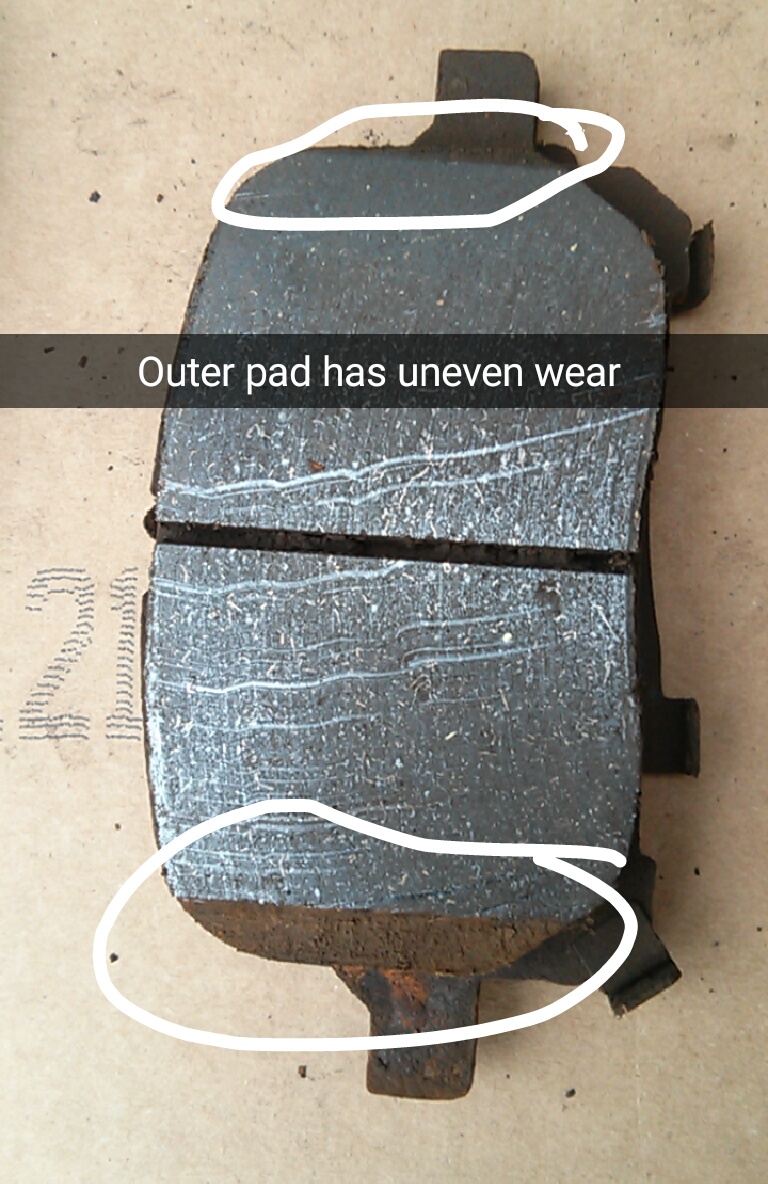
I took the caliper, pads, and rotor off the car and placed them on the ground for inspection. I made sure to keep track of which side each pad was on. Upon inspection of the pads, I noticed that the outer pad had significant uneven wear.
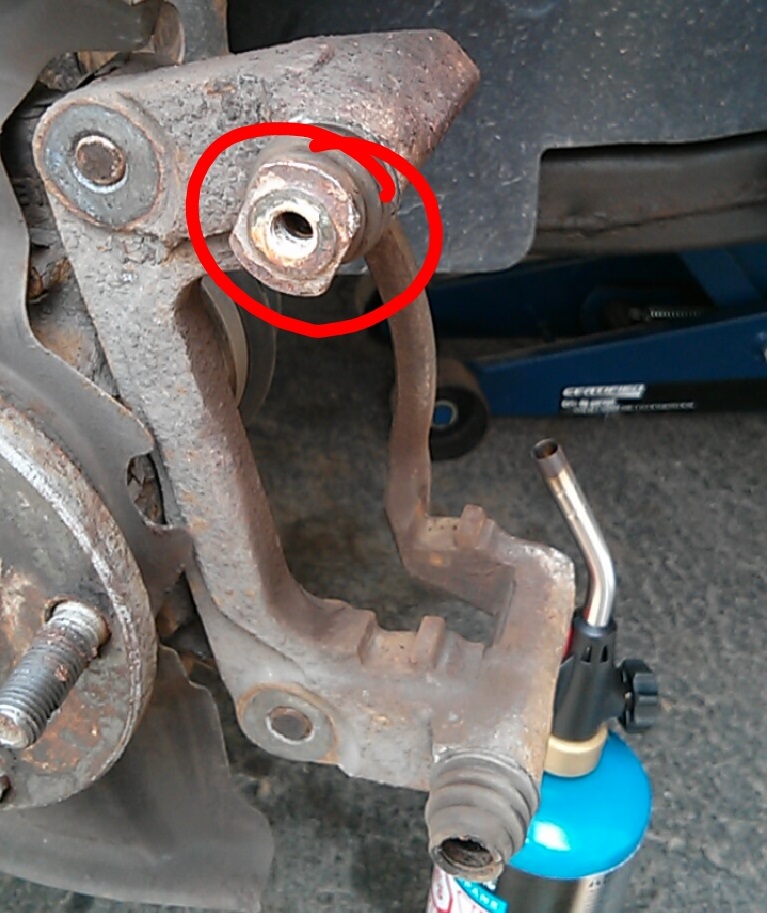
I took a look at the caliper bracket and went to remove the sliding pins to re-lubricate them. I was able to remove one but the other was completely stuck. This is the cause of the uneven wear of the pad. Since the pin wasn't moving at all, the one side of the pad was staying away from the rotor, and only the other side was being pushed against the rotor. I mounted the caliper backwards to the car and tried to loosen it by using a vice and twisting it. When that failed I tried to torch it to try to break any rust, and also tried hitting it with a hammer to budge it. But nothing managed to budge it at all. I put a bolt in the thread of the sliding pin and tried to use a breaker bar to twist it loose, but only ended up shearing the bolt in the sliding pin, rendering the bracket unusable.
Deciding to Replace Calipers
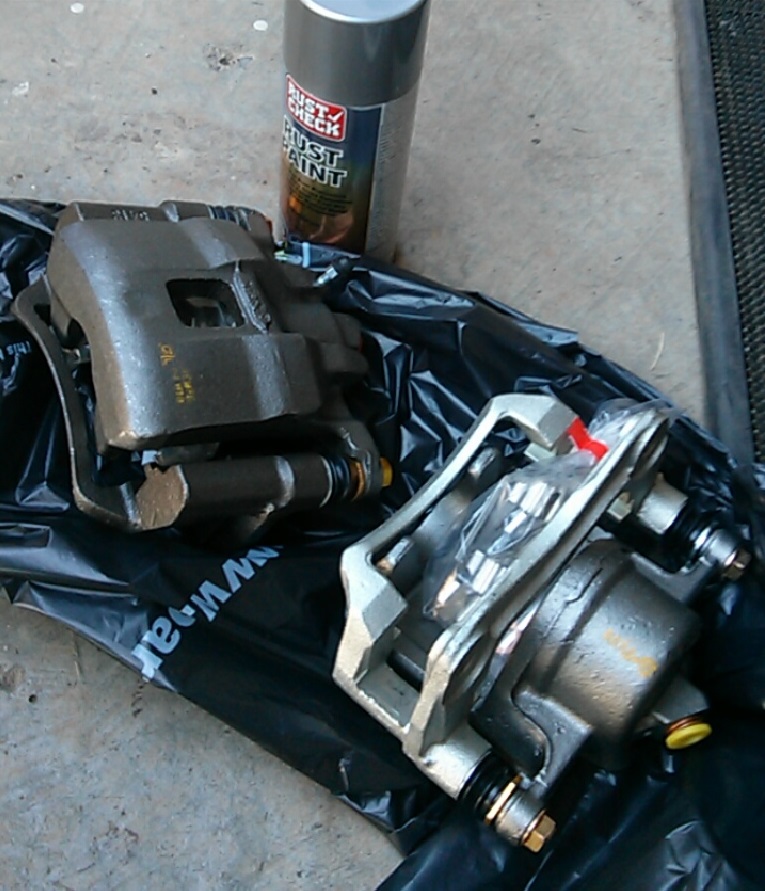
At this point I decided to buy a re-manufactured pair of front calipers. I decided to replace both sides as I like to keep any suspension or brake work even on each side. I also got some rust paint to cover them with to hopefully hold back the rust for a while. The calipers came with everything but the bolts that hold the bracket to the car itself, which I unfortunately gave to the parts store with my core return. A quick trip back to the store to pick them up and I was on my way again. The calipers in this photo are actually Corolla calipers, which I was given mistakenly and didn't notice until too late as they were almost identical to the Avalon's calipers, only slightly too small to bolt to the car or fit around the rotor. Yet another trip back to the parts store was needed the next day.
Cleaning and Assembly
I painted the part of the caliper with the piston black, and painted the bracket aluminium. I also painted the rotor hub aluminium. While the paint dried, I did some work on the pads and rotors. I removed rust from the hub of the rotor using a wire brush and sand paper. I then sanded the rotor surface to remove any glaze or debris that may have built up over time. Once finished with the rotors I sprayed them with brake cleaner and wiped them clean.
I cleaned out the grit that had built up in the groove in the middle of the pads. I also sanded the friction material of the pad down to remove any glaze build up. The material went from shiny to matte after sanding. I wire brushed and sanded rust buildup. I then sprayed them with brake cleaner and wiped them clean. Some of the dampening shims, used to reduce squeal, had come off the pads (they seemed to be glued to the pads), so I put some brake lubricant on the back of them and held them back onto the brake pad. I also applied brake lubricant on the front side of the shims, where they contact the caliper piston and bracket. I switched the position of the inner and outer pads so I'd install them on the opposite side they were originally installed on so they'd wear evenly.
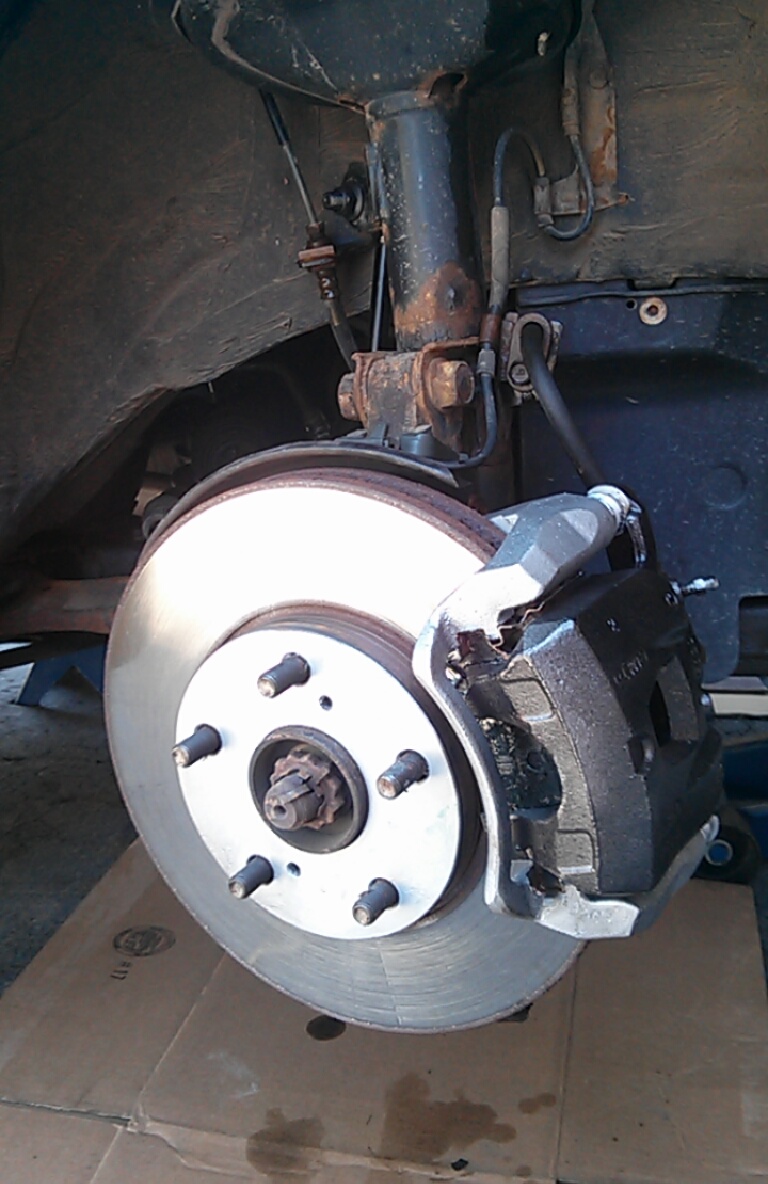
Now that the paint had dried, I went to assembling the brakes. I applied brake lubricant to the points on the calipers where the brackets touched, and anti-seize on the brackets themselves where the pads touch. I didn't lubricate the sliding pins as they were already lubricated, and I wanted to keep the rubber covering closed over it. I applied a bit of brake lubricant to the piston ring as well. I put the rotor on the car, bolted on the bracket, clipped the pads to the rest of the caliper and bolted that to the bracket.
Bleeding Brake Fluid
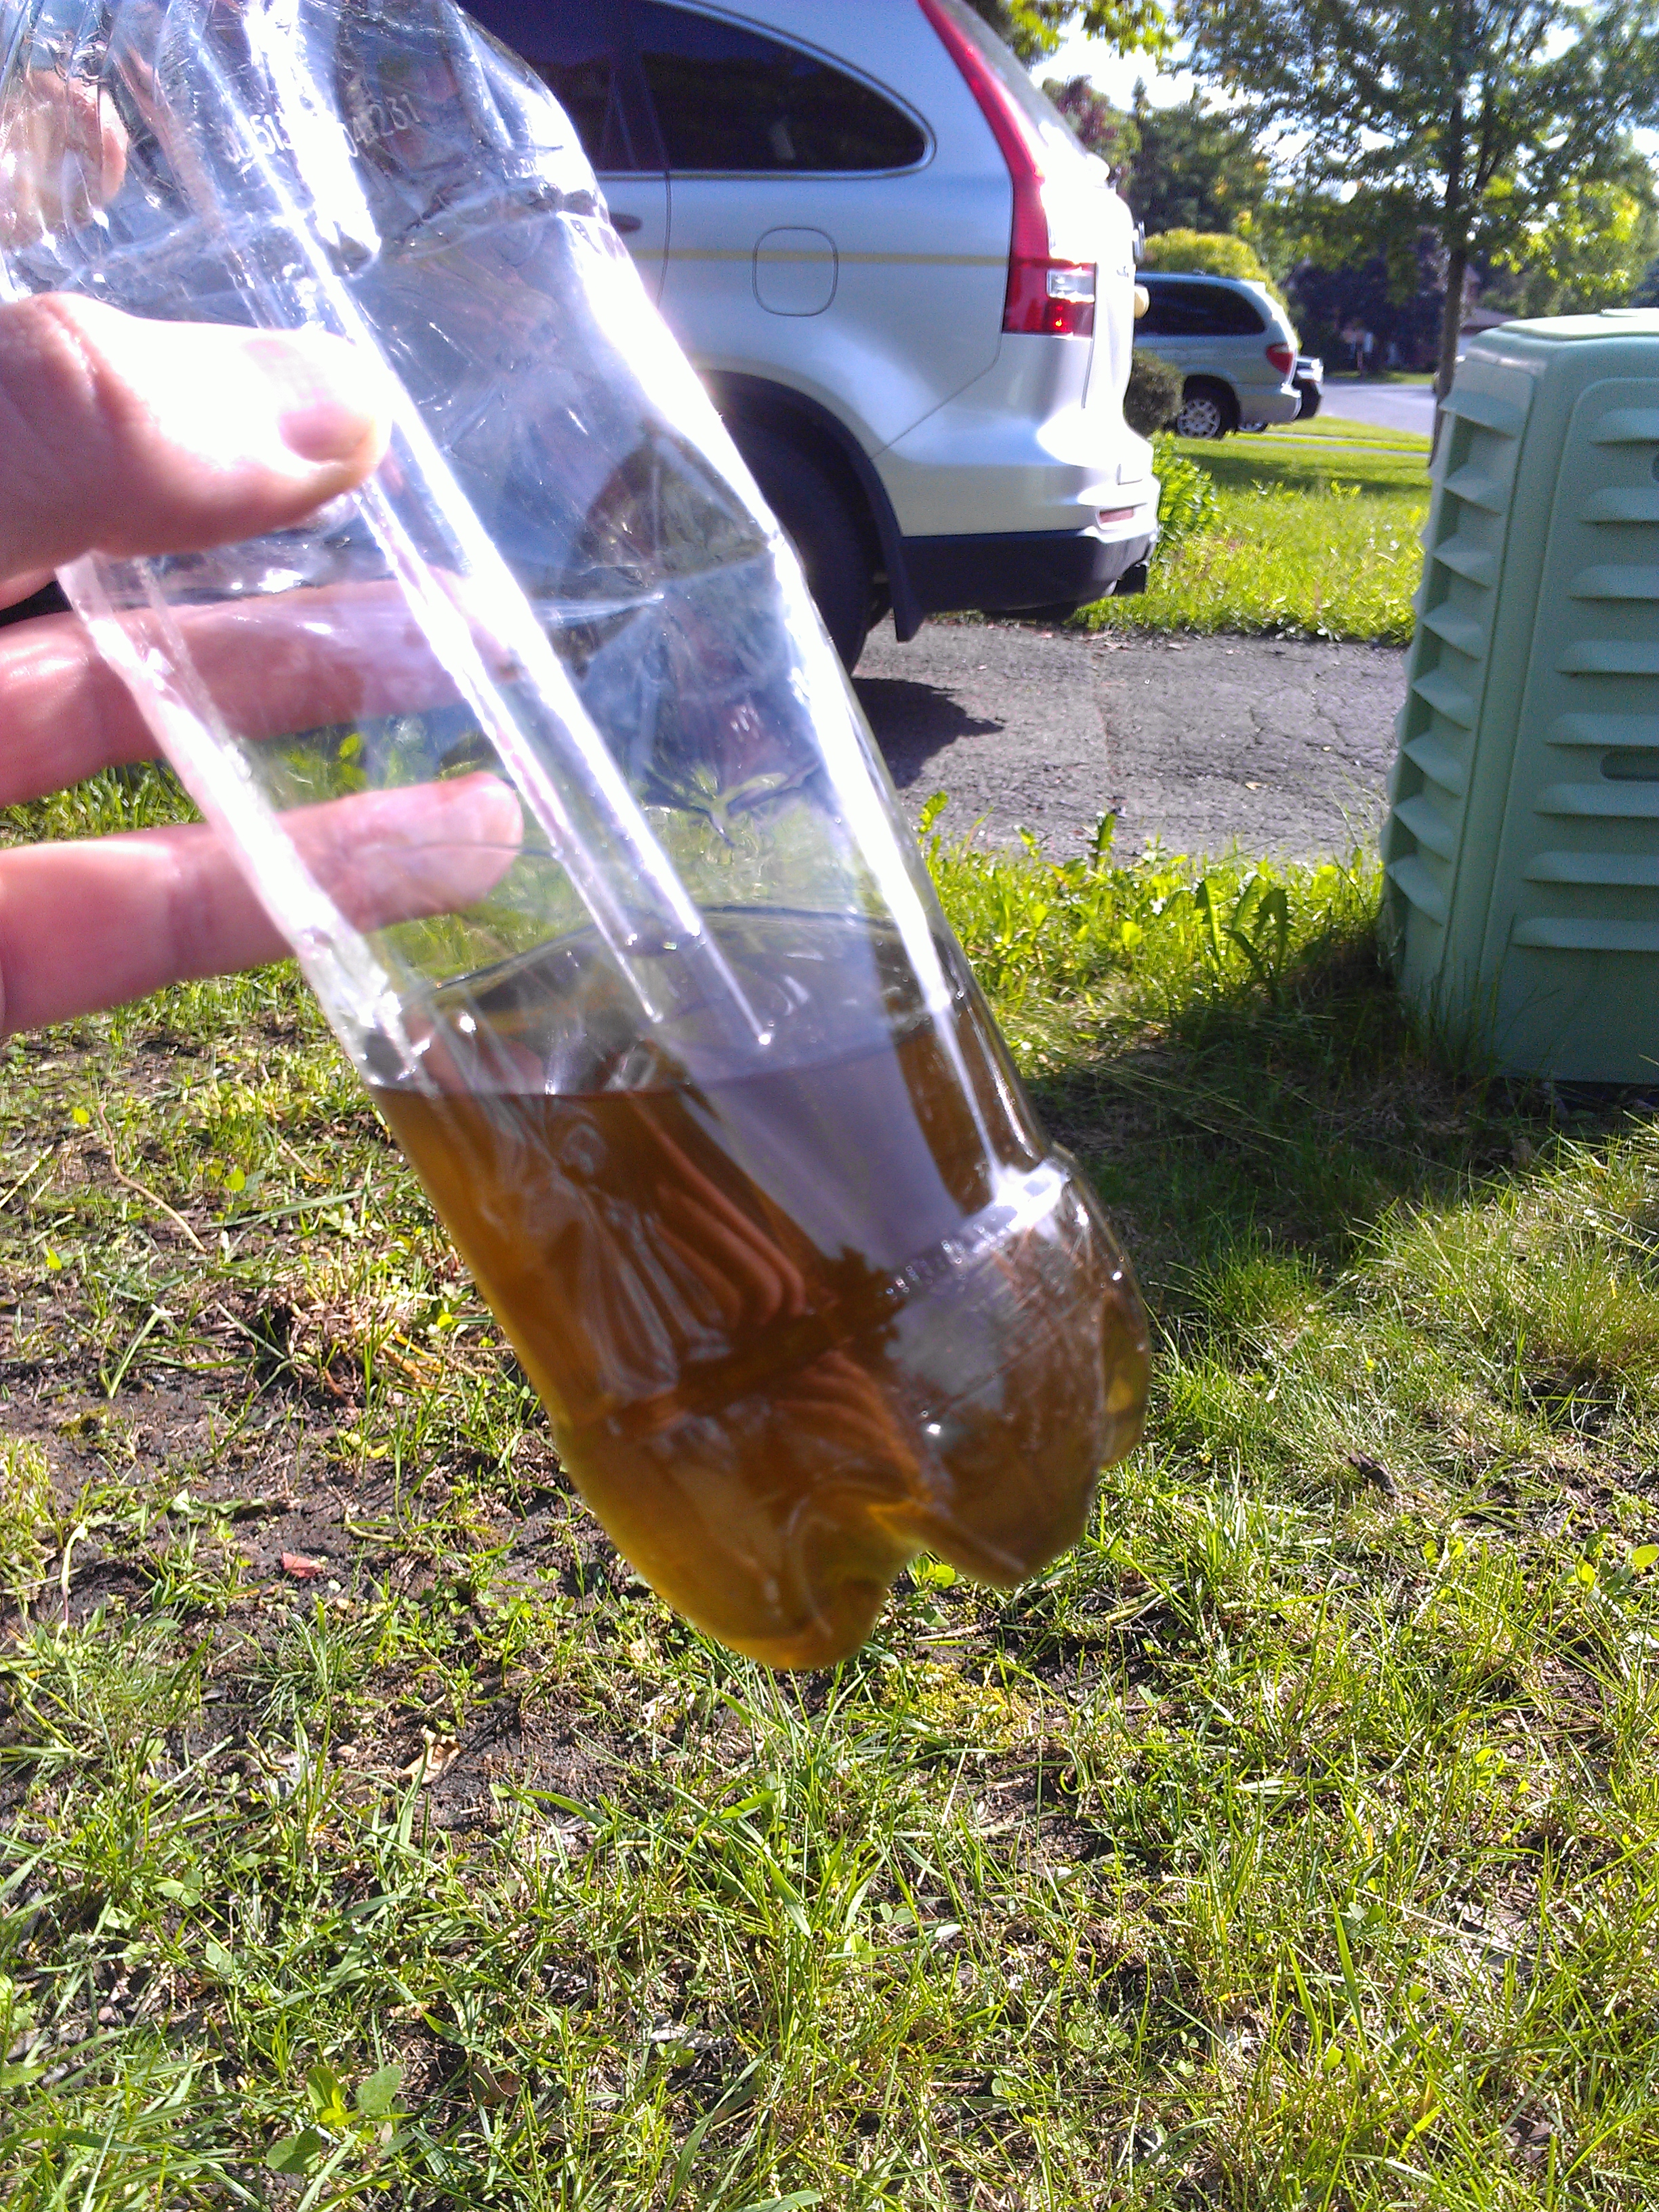
I was careless and let my brake lines drain brake fluid all the way up to the master cylinder. I now had to add new brake fluid and make sure I got all the air out of the lines. I previously made a hose and bottle solution for catching the oil as it bled out of the caliper. Get a plastic bottle and a small clear hose, cut a hole in the bottle cap to let the hose through, put the other end of the hose around the bleeder nipple. This way the fluid coming out will go into the bottle rather than making a mess on the ground.
To add in new fluid I topped off the master cylinder, stepped in the car, and depressed the pedal a couple of times, making sure never to bottom it out. Some like to put a brick or block of wood behind the pedal. It's important not to let the master cylinder empty or air will get into the system again. So I would top it off after every couple of pedal presses. After many iterations of that, I eventually had fluid coming out of the caliper. I repeated the process with the other side. With the bleeder nipples closed, I tested the pedals to make sure I didn't have any air in the lines. I had some air last time I bled my brakes, and the way I could tell was that depressing the pedal was very light until near the end where it suddenly got stiffer, but then when it would usually stop going, it would continue to slowly depress as the air is compressed.
Test Drive
I quickly tested the brakes on my driveway before going on the street to make sure there wasn't something catastrophic missing. With the just-completed maintenance, the improvement in the brakes was very apparent. The pads grabbed quicker and stronger, and I got no light squeal like before. After the test ride I checked the brake temperatures on each side to make sure that one wasn't dragging, and found them to be similar.